
Is Your AC Running But Not Keeping Up? Here's What to Check First
If your AC is not cooling properly, knowing what to check first can save you a service call — and a lot of sweating. Most of the time, the fix is simpler than you'd expect.
Quick Answer: AC Not Cooling Properly — What to Check First
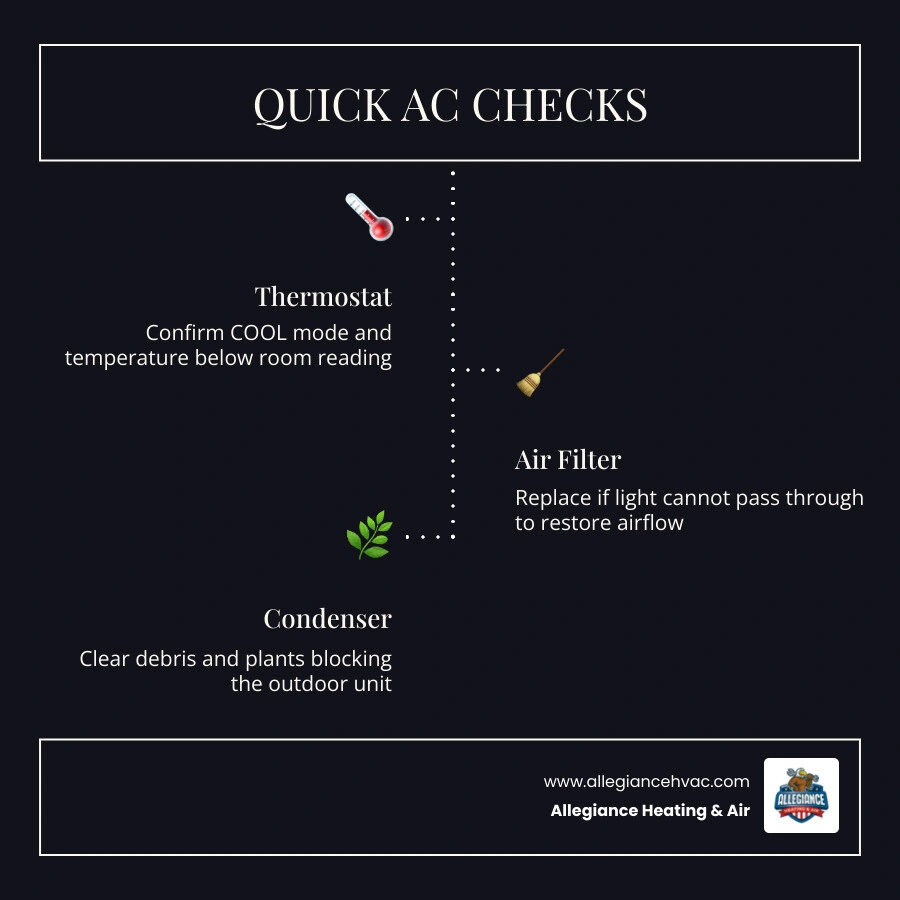
- Thermostat settings — Make sure it's set to COOL mode and the temperature is lower than the current room temperature
- Air filter — Hold it up to a light; if no light passes through, replace it immediately
- Circuit breaker — Check your electrical panel for a tripped breaker
- Outdoor condenser unit — Look for debris, overgrown plants, or blockages around the unit
- Evaporator coil — Check for visible ice buildup on the refrigerant lines near the indoor unit
Research shows that three simple checks resolve the majority of "AC not cooling" calls — often in under 15 minutes — before a technician ever needs to set foot in your home. A clogged air filter alone is the number-one cause of cooling failures, and it's one of the easiest things any homeowner can fix on their own.
That said, some problems go deeper. If you're a homeowner in Greenville, IN dealing with a system that just won't keep up — especially during a hot Indiana summer — it helps to know exactly where to start and when to stop DIYing and call in a professional.
This guide from Allegiance Heating & Air walks you through five clear, ordered steps to diagnose and fix the most common AC cooling problems safely and quickly.
AC Not Cooling Properly: What to Check First

When your house starts warming up in the middle of a sweltering July afternoon, it is easy to panic. Before you assume your entire air conditioning system is ruined, it is important to take a structured approach to troubleshooting.
Your central air conditioner is a complex, split system. The indoor unit (the air handler or furnace blower) and the outdoor unit (the condenser) must work in perfect harmony to pull heat out of your home. If a single component in this chain is interrupted by a lack of power, restricted airflow, or incorrect control signals, the entire cooling process breaks down.
When your system is running but the indoor air feels stagnant or warm, we always recommend starting with the simplest, lowest-risk checks. This systematic diagnostic process ensures you do not waste time or money on a professional service call for a minor issue like a flipped switch or a dead battery. Let's look at the first two critical steps you should perform the moment you notice a cooling issue.
Step 1: Verify Your Thermostat Settings
The thermostat is the brain of your entire HVAC system. It is the first point of control, and surprisingly, it is also responsible for a massive percentage of unnecessary service calls.
First, look closely at the digital display. If the screen is completely blank, your thermostat has likely lost power. Many modern thermostats run on physical batteries (usually AA or AAA) that must be replaced annually. If your display is dark or dim, swap in a fresh set of high-quality alkaline batteries.
Next, verify the operational mode. It sounds incredibly simple, but check to ensure the thermostat is set to COOL rather than HEAT or OFF. It is incredibly common for a family member to accidentally bump the switch or for a smart thermostat to revert to its default settings or a "Fan Only" mode following a firmware update or a minor power glitch.
Additionally, pay close attention to the fan setting. Your thermostat will have options for ON and AUTO:
- ON: This setting keeps the indoor blower fan running continuously, 24 hours a day, regardless of whether the outdoor cooling compressor is actually running. When the compressor cycles off, the fan continues to blow unconditioned, room-temperature air through your vents, which can make it feel like your AC is blowing warm air.
- AUTO: This is the recommended setting for normal operation. It ensures the blower fan only runs when the system is actively cooling the air, preventing unconditioned air and humidity from being recirculated back into your living spaces.
If your system has recently shut down, keep in mind that almost all modern air conditioners feature a built-in compressor lockout delay. This safety feature prevents the system from short-cycling by forcing the compressor to wait 5 minutes before restarting after a shutdown. If you have just adjusted your settings, give the system a few minutes to recover and begin blowing cold air. If you find that the indoor fan runs but you only get lukewarm air, you may want to read more about Why AC is Blowing Warm Air to understand what is happening under the hood.
Step 2: Inspect and Replace the Air Filter
If your thermostat settings are correct but you are still dealing with weak airflow or rising indoor temperatures, the very next thing you must inspect is your air filter.
An air filter's primary job is to protect your indoor evaporator coil and blower motor from dust, pet dander, and airborne debris. However, as it captures these particles, the filter slowly becomes clogged. A heavily clogged air filter acts like a solid wall, severely restricting the volume of air that your blower motor can pull through the system.
When airflow is restricted, your air conditioner cannot transfer heat out of your home efficiently. This lack of airflow causes the temperature of your indoor evaporator coil to drop below freezing, leading to ice buildup and a total system shutdown.
To check your filter, turn off the power to your HVAC system at the thermostat or the indoor power switch. Locate the filter slot (usually found in the return air duct next to the indoor handler or inside a return air grille on your wall or ceiling). Pull the filter out and hold it up to a nearby light source:
- If you can easily see light passing through the fibers, your filter is clean enough to allow proper airflow.
- If the filter is dark, gray, covered in a thick layer of dust, and completely blocks the light, it is clogged and must be replaced immediately.
For standard 1-inch pleated filters, we recommend inspecting them every 30 days and replacing them at least every 90 days. If you have pets, allergies, or a busy household, you may need to change them even more frequently. Running your system with a dirty filter can lead to a host of issues, which is why a clogged filter is often the reason your AC Might Be Blowing Warm Air.
Advanced DIY Troubleshooting Steps
| Troubleshooting Step | What to Check | Potential DIY Fix | When to Call a Professional |
|---|---|---|---|
| Thermostat | Power, batteries, and mode settings | Replace batteries; set mode to COOL and fan to AUTO | Thermostat needs recalibration or wiring repair |
| Air Filter | Dirt accumulation and airflow restriction | Replace the filter immediately (every 30–90 days) | Blower motor failure caused by prolonged restriction |
| Outdoor Condenser | Debris, weeds, and dirty coil fins | Clear a 2-foot perimeter; gently hose down the coils | Broken condenser fan motor or damaged electrical contactor |
| Evaporator Coil | Ice buildup and frost on refrigerant lines | Turn off AC, run fan on ON mode to thaw for 4–6 hours | Refrigerant leak or faulty expansion valve |
| Condensate Drain | Standing water, clogged drain line, or tripped float switch | Vacuum the drain line with a wet/dry shop vac | Damaged condensate pump or deep internal blockages |
Once you have verified that your thermostat is configured correctly and your air filter is clean, you can move on to slightly more advanced DIY checks. These steps involve inspecting the physical components of your system, including the outdoor condenser unit, the indoor evaporator coil, and your condensate management system.
Step 3: Clean the Outdoor Condenser Unit
The outdoor unit, or condenser, is responsible for releasing the heat that was absorbed from inside your home out into the surrounding outdoor air. To do this effectively, the condenser fan pulls massive amounts of outdoor air through thousands of tiny, tightly spaced aluminum fins on the condenser coil.
Because the outdoor unit is exposed to the elements, it easily becomes dirty and obstructed. Grass clippings from lawnmowers, fallen leaves, cottonwood seeds, weeds, and windblown trash can collect on the surface of the coil. When these debris block the fins, the heat cannot escape. This causes the compressor to run exceptionally hot, dramatically reducing cooling efficiency and eventually leading to permanent compressor damage from overuse.
To clean your outdoor condenser safely:
- Turn off the power: Locate the outdoor electrical disconnect box mounted on the wall near your unit. Pull the disconnect plug or flip the switch to the OFF position to cut high-voltage power to the condenser.
- Clear the perimeter: Remove any weeds, tall grass, bushes, or debris within at least 24 inches of the unit. This ensures unobstructed airflow around all sides of the cabinet.
- Clean the coils gently: Take a standard garden hose equipped with a spray nozzle. Spray the coils gently from the top down, washing away accumulated dirt and pollen. Never use a pressure washer, as the high-pressure stream will instantly bend and damage the delicate aluminum fins, permanently restricting airflow.
- Straighten bent fins: If you notice areas where the metal fins have been bent or crushed, you can use a specialized HVAC fin comb to gently restore them to their original shape.
Step 4: Check for a Frozen Evaporator Coil
The indoor evaporator coil is where the actual cooling magic happens. Liquid refrigerant circulates through the coil, absorbing heat from the warm indoor air blowing across it. However, if airflow is restricted (due to a clogged filter or closed supply vents) or if your system is low on refrigerant, the temperature of the coil will plummet below freezing.
When this happens, the natural moisture in your indoor air condenses on the cold metal and instantly freezes. Before long, a thick layer of ice forms over the entire evaporator coil, acting as an insulator. This ice blocks the heat transfer process completely, resulting in weak, lukewarm airflow from your vents.
To check for a frozen coil:
- Look at the copper refrigerant lines entering your indoor air handler. If you see frost or ice forming on the brass valves or the insulated copper suction line, your coil is frozen.
- Listen to your system. If you hear a gurgling sound or notice water pooling around the bottom of your indoor unit, ice may be actively melting.
If you discover ice, do not keep running the AC. Running a frozen system puts incredible strain on your compressor and can lead to liquid refrigerant returning to the compressor, which will destroy it.
Instead, turn the system completely OFF at the thermostat, but switch the fan setting to ON. This keeps your indoor blower running to pass warm room-temperature air over the frozen coil, melting the ice naturally. Allow 4 to 6 hours for the system to thaw completely before attempting to run it again with a clean filter. If your system continues to freeze up or short-cycle, it may be experiencing a deeper issue. Learn more about how these issues affect your system's operation by reading about why an AC Cycles On and Off Frequently.
Step 5: Clear the Condensate Drain Line
As your air conditioner cools your home, it also acts as a dehumidifier, pulling gallons of moisture out of the humid Indiana air. This moisture condenses on the evaporator coil and drips down into a drain pan below. From there, it flows through a PVC condensate drain line to a floor drain, utility sink, or the outdoors.
Because this drain line carries warm, dark, and damp water, it is the perfect breeding ground for algae, mold, and slime. Over time, this biological growth can form a thick clog, backing up the water into the drain pan.
Modern air conditioners are equipped with a safety float switch mounted on the drain pan or drain line. If the water rises too high, the float switch trips, instantly cutting power to your outdoor condenser or the entire system to prevent water damage and flooding in your home.
If your system suddenly shuts down and won't turn back on, check the condensate drain line:
- Locate the PVC drain line near your indoor unit.
- Look for a cleanout T-joint or access cap.
- If you see standing water in the drain pan or the safety switch is floating, you have a clog.
- To clear it, attach a wet/dry shop vacuum to the outdoor end of the condensate line. Seal the connection with a rag and run the vacuum for a few minutes to suck out the accumulated algae, dirt, and water.
- Once clear, pour a cup of distilled white vinegar down the indoor cleanout port to kill any remaining algae and prevent future blockages.
When to Call a Professional for AC Cooling Issues
While basic maintenance and simple troubleshooting are well within the reach of most homeowners, there is a clear line where DIY fixes must stop. Central air conditioners contain high-voltage electrical circuits, delicate mechanical parts, and pressurized chemical refrigerants that require specialized training, licensing, and tools to handle safely.
Attempting to perform advanced repairs yourself can lead to severe personal injury, voided equipment warranties, and incredibly expensive mistakes. If you have run through the basic checklist — verifying the thermostat, replacing the filter, cleaning the condenser, and ensuring the drain line is clear — and your home is still not cooling, it is time to bring in a licensed professional.
Knowing when to call for help can prevent a minor issue from turning into a total system replacement. If you notice signs of electrical faults, unusual noises, or complete system failures, you should read about the Signs You Need Emergency AC Repair to protect your home and family.
Identifying Refrigerant Leaks and Compressor Problems
Your air conditioner's refrigerant is housed in a closed, sealed system. Unlike the gasoline in your car, refrigerant is never "consumed" or used up. The same charge of refrigerant cycles through your system continuously for the entire lifespan of your unit.
If your system is low on refrigerant, it means you have a physical leak somewhere in your copper lines, evaporator coil, or condenser coil. Common signs of a refrigerant leak include:
- A persistent hissing or bubbling sound coming from the indoor or outdoor unit.
- Lukewarm air blowing from your vents even though the system is running continuously.
- Ice forming on the indoor evaporator coil or the outdoor refrigerant valves.
- Oily residue on the refrigerant lines, which indicates that compressor oil is escaping along with the refrigerant.
Only EPA Section 608 certified technicians are legally allowed to handle, recover, and charge refrigerant. A professional technician will use specialized leak-detection tools (such as electronic sniffers or ultraviolet dyes) to locate the leak, repair the copper tubing, and recharge your system to the exact manufacturer specifications.
Additionally, if your compressor — the heart of your outdoor unit — is failing, you may hear loud clanging, screeching, or buzzing sounds when the unit tries to start up. If your compressor fails or your system suffers from electrical faults like a blown capacitor, these are complex issues that require expert diagnostics. To understand what goes into these advanced repairs, check out our guide on AC Problems That Require Expert Repair.
Addressing Leaky Ductwork and Uneven Cooling
Sometimes, your air conditioner itself is working perfectly, but the cooled air simply isn't making its way into your living spaces. This is almost always due to issues within your ductwork.
According to the U.S. Department of Energy, the typical home loses up to 20% to 30% of its conditioned air through leaks, holes, and poorly connected ducts. When your ductwork is leaky:
- Cooled air escapes into your attic, crawlspace, or wall cavities before ever reaching your rooms.
- Dirty, unconditioned air from those unfinished spaces is pulled into your ductwork, degrading your indoor air quality and adding humidity to your home.
- You will notice extreme temperature differences between rooms, with some areas of your home feeling icy cold while others remain stiflingly hot.
If you are dealing with uneven temperatures across your home, your ductwork may need to be professionally sealed, insulated, or redesigned. For more information on why some rooms are warmer than others and how to solve it, take a look at our article on AC Not Cooling Evenly.
Frequently Asked Questions About AC Troubleshooting
Why is my ac not cooling properly what to check first to save time?
If your system is running but your home is getting warmer, the absolute first things to check are your thermostat settings and your air filter. Make sure your thermostat is set to COOL and the fan is on AUTO. Then, check your air filter. If the filter is clogged with dust and blocking light, replace it immediately. These two quick checks take less than five minutes and resolve the vast majority of cooling complaints.
How do I know if my evaporator coil is frozen?
You can identify a frozen evaporator coil by looking for visible frost or ice on the copper refrigerant lines near your indoor unit, experiencing exceptionally weak or warm airflow from your supply registers, or noticing water pooling around the base of your furnace or air handler. If your coil is frozen, turn your system off immediately at the thermostat and set the fan to ON to begin the thawing process.
If my ac not cooling properly what to check first before calling a technician?
Before calling an HVAC technician, run through this quick checklist:
- Verify the thermostat has fresh batteries and is set to COOL.
- Check your home's main electrical panel for any tripped circuit breakers.
- Replace your air filter if it is dirty.
- Ensure your outdoor condenser unit is clear of weeds, leaves, and debris.
- Confirm that all supply and return vents inside your home are open and completely unobstructed by furniture, drapes, or rugs.
If you have completed these steps and your system still isn't cooling, do not wait. Some issues can worsen rapidly, so check out these AC Problems That Can't Wait to see if you need to schedule immediate service.
Conclusion
Dealing with an air conditioner that isn't cooling properly can be incredibly frustrating, but taking a systematic approach to troubleshooting can help you identify and resolve simple issues quickly. By checking your thermostat settings, replacing dirty air filters, and keeping your outdoor unit clear of debris, you can handle the most common cooling obstacles yourself.
However, when DIY troubleshooting isn't enough, you need an HVAC team you can trust. Since 2005, Allegiance Heating & Air, LLC has been proud to serve homeowners across Greenville, IN, and surrounding Southern Indiana communities. As a family-owned business, we are dedicated to "Taking Home Comfort Under Our Wing" with honest, transparent service and professional, experienced technicians.
The best way to avoid unexpected cooling failures is through routine preventative maintenance. To keep your system running at peak performance all summer long, explore our guides on Essential Air Conditioner Maintenance and our comprehensive Air Conditioner Maintenance Guide. Investing in regular tune-ups is the single most effective step for Prolonging Your AC's Lifespan and lowering your monthly energy bills.
Don't spend another day sweating in your own home. If your air conditioner needs expert attention, contact us today to Schedule professional air conditioning services in Greenville, IN and let our family take care of yours.
Contact Us Or Schedule Expert Service
Other Blogs
ready to transform your home?
Discover our exceptional home services tailored to meet your needs and enhance your living space.
WHAT OUR CLIENTS HAVE TO SAY ABOUT US

We had a complete HVAC system and a hot water heater installed. The guys were professional, well mannered, and completed the work in a timely manner. Would definitely use them again.
I was nervous at first because my AC broke in the middle of 80 degree weather which is strange for April, but Allegiance Heating and Air was incredibly prompt and professional. The technician arrived within an hour, explained the problem clearly, and completed the repair. The technician , Mr. Garrett Moon was a very nice and courteous young man. He found the problem and fixed it within a timely manner. I highly recommend them for any heating or cooling needs. I’ll definitely give them a call again should I ever have another issue, but hopefully not. Knock on wood 😁. Give them a call… you won’t be disappointed!
From the moment I called to schedule a service, the team was quick to respond and arrived right on time. The technician was professional, friendly, and clearly knowledgeable about my heating system. He explained the repair options in plain language and completed the job efficiently. I appreciated the reliable service and the fact that the work was done the same day. I would definitely recommend Allegiance Heating and Air for any residential HVAC needs.
5/5 stars – I was very impressed with the efficient, affordable and timely service from Allegiance Heating and Air. The technician arrived on time, and performed the service quickly, no repairs needed at this time. Communication was clear and the whole experience felt hassle‑free. I would definitely recommend them for any residential HVAC needs.
Knowledgeable, experienced individual.
Explains Allegiance Heating and Air was incredibly reliable, professional and affordable. They arrived right on time, kept the work area clean and finished the furnace repair quickly. The technician explained everything clearly and the price was a great value. If happiness had a location on Google Maps, it would be here.
Gilbert had to go above and beyond because York is no longer making the part for my furnace. But he was able to find a way to construct a housing bracket for my furnace. Ingenuity, determination and integrity is what finally got my furnace fixed. Gilbert is truly a one of a kind technician.
Thank you for always going the extra mile. Gilbert is always respectful and helpful with any concerns.
"Great service, most knowledgeable and capable HVAC business in Kentuckiana!! Pete Flemming and Bryan the owner, are HVAC encyclopedias. They have the highest integrity of any HVAC business I have ever used. Allegiance has put numerous units in for me over the last 17 years. I will continue to use and trust them."
"Fast response from Allegiance when our heat was out on New Year’s day! Service technician was friendly and efficient. He took the time to explain the problem, tell us about the temporary fix and the plan for permanent repair. We were impressed!"
"Love Allegiance! Their technicians, in particular Benjamin, explain everything. Fast and thorough. A/C was out on a Sunday. Called Allegiance and within a few hours Benjamin arrived. Such a comfort as he was the one who last serviced our units. He quickly replaced part and cooling is restored!"
"My heat pump went out and I had to call after hours. The technician (Garrett) was outstanding and thorough. He got my system up and working until Monday and gave me several options of units. Also took the time to explain the issue to my Home warranty company. I highly recommend this company."
"Right on time :) respectful, fast, and polite. Even gave my fur babies some attention."
"Had Garrett out today to fix our AC. Fantastic tech. He showed up exactly when he said he would and kept us informed of what he was checking and what he found. Highly recommend!"
"Lucas with Allegiance showed up on time as promised, was professional and extremely patient and responsive with all my questions. He took care of the issue, and I feel he was trustworthy! He had us back to cool and comfortable on one of the hottest days of the year."
"Lucas did a great job! Very professional and expedient. Explained the process very well and represented Allegiance as a truly professional and reputable company."
"Arrived on time and work diligently to fix issue. These guy are great. Worked quickly to resolve my issues."
"Lucas was great - he spent a lot of time trying to figure out what was going on and explained everything he was doing. I trust Allegiance and wouldn’t want anyone else working on/in my house!!"

RELATED ARTICLES

The Upstairs Bedroom Dilemma: Adding a Window Unit vs. Fixing Your Home's Air Balancing
The August Fatigue: Why Well-Maintained ACs Suddenly Struggle at Summer's End